So… You want to sell an API you’ve made, but you don’t want the hassle of setting up API keys, a user management site and all the rest (payments, key rotation etc).
PayPI isn’t quite like other API marketplaces, we don’t market your API (so we’re not really a marketplace…), but we do provide all the tools for you to sell your API online. Your users get a single account at paypi.dev and they can see all the APIs they’re subscribed to all in one place. You get a place to see all your API’s and a link to give your users so they can subscribe and see your pricing.
We also don’t act as a proxy like other marketplaces, speeding up requests and giving you more control over how you take requests, just setup with our SDK and start authenticating users.
On to the show!
1. Create an account
Create a PayPI account at paypi.dev, then open up the team menu and select “Sell on PayPI” to become an API seller.

2. Create an API and add charges
Create an API through the APIs page, once you’ve done this you need to decide what to charge your users. Charges are created in the “charges” section of your API dashboard, they state what you are going to be charging your users for and how much.
There are two types of charge on PayPI:
Static — Charge a set amount for each request.
Dynamic — Charge a different amount per request, this works great if you need to charge for usage, such as per MB.

Check out our docs for more info: https://partner.paypi.dev/api/charges
3. Implement PayPI in your API
First fetch the Node package:
yarn add paypiImport PayPI and set your API key (this is shown in the ‘Development’ of your API management page):
import PayPI from "paypi";const paypi = new PayPI("<YOUR API SECRET>");Now whenever you receive a request you should check the given API Key using the `paypi.authenticate` method. You can receive the key in whatever format you require, usually through the Authentication header. Just make sure you make this clear to your users.
I’ve thrown in express here to give you a proper overview of how it would look:
import PayPI from "paypi";
import express from "express";

const app = express();
const port = 3000;
const paypi = new PayPI("<YOUR API SECRET>");

app.get("/", async (req, res) => {
  const subscriberSecret = req.get("Authentication");
  const user = await paypi.authenticate(subscriberSecret);

  // Do some processing, fetch response data, etc

  // Charge the user using your ChargeID
  await user.makeCharge("cid-R4tfSt4");

  res.send("Hello World!");
});

app.listen(port, () => {
  console.log(`Example app listening at http://localhost:${port}`);
});
Once you call user.MakeCharge payment will be taken from the user for this request. For this reason ensure this is done at the end of the request, to ensure that you can fulfil the request before taking payment.
For more information check our our docs: https://partner.paypi.dev/getting-started#3-setup-your-api-application
5. Distribute your API share URL
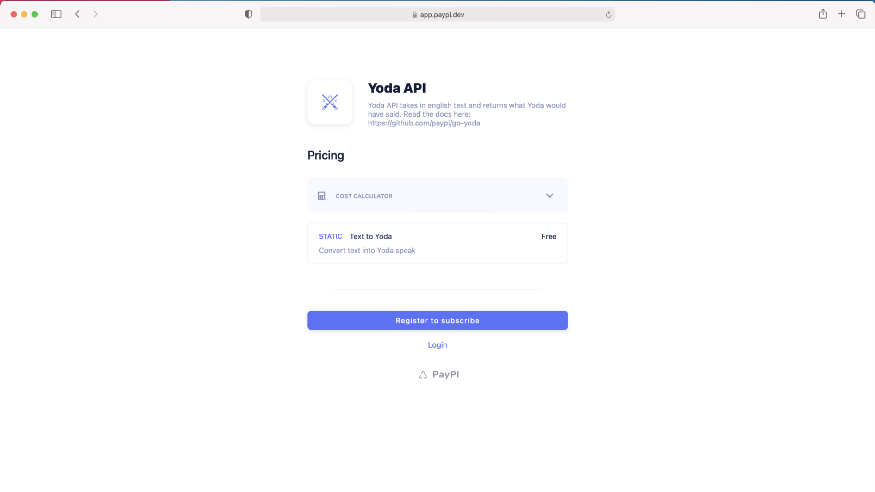
Once you’ve created charges you can distribute your share URL, this sends users to a page like this, so they can subscribe to your API:

Where should I put my share link?
Put it anywhere you like! We think it works great anywhere you’ve got your docs, we love gitbook (if you haven’t taken a look at their website you should), or even put it in a github repo like we’ve done here: https://github.com/paypi/go-yoda .
'Study > Node.js' 카테고리의 다른 글
| No such file or directory: 'dev' 앱충돌 날 땐? (0) | 2021.11.21 |
|---|---|
| 이더리움 웹앱 만드는 방법 (0) | 2021.11.12 |
| Node.js 서버에 파일 업로드 하기 (Multer) (0) | 2021.11.12 |
| Node.js로 웹 스크랩핑 해보기 (0) | 2021.11.11 |
| [NodeJS] NodeJs 모듈 업데이트 하는 방법 | Package.json의 종속성을 업데이트 해보자. (0) | 2021.07.25 |

|

|

|

|

|